HI THERE!
This is my first blog post in a reaaal long while and that's not because I haven't had the time to come up with anything. It's just that I...never came up with anything. The longer I waited for an idea, the more amazing I felt it had to be and so I left it and left it until I semi-abandoned this little writing-haven of mine. Which is very much not cool and I intend to redeem myself.

...shortly followed by a series on the Great British Bake Off which starts TONIGHT!
 |
(check back soon for that deliciousness)
|
A couple of weeks ago I decided to start brain-storming stuff for my dissertation as I'm soon to enter the excitingly daunting land of Third Year. Normally, for exams and the like, I brainstorm on humongous sheets of paper with my 1 billion coloured pens but a voice suddenly echoed through my brain like I was one of the many troubled characters in Stranger Things. "RESEARCH JOURNAL.......GET A RESEARCH JOURNAL......ALSO BUY MORE ICED TEA BECAUSE YOU REALLY LIKE THAT STUFF," the voice said.
So the next day I walked into a big shop called Monsieur John Lewis and had a choice between a lot of fancy notebooks with stripes and stars and sarcastic phrases on. The sarcastic phrases I liked the most but it turns out that having "I'm a notebook, bite me" on the front makes one of these things double in price. It was then that I decided to design my own cover and buy a cheaper, plain ring-binded kiddo.
1. Buy/find a plain notebook with a cardboard cover.
 |
| my NB, featuring my weirdly flexible thumb |
Cardboard covers work much better than plastic for this; plastic is generally much harder to stick things to/draw on/paint.
2. Gather all materials/equipment needed and lay it out in an arty fashion.

Okay that last part is unnecessary but it does make for a good blog photo. As I wanted to doodle my diss thoughts into this journal as soon as possible, I chose to avoid painting and stick to good old collage and Sharpies. I prepared the following materials:
- Notebook (erm)
- Range of Sharpies (other coloured markers or felt pens will do)
- Pencil
- Glue Stick
- Scissors
- Magazine cuttings of cool textures and colours that I like
- Spare magazine (just in case)
- Groovy inspirational photo of a bunny and some fake mushrooms (optional)
3. Suss out your colour scheme(s).

Rainbows are great - everyone knows this fact (I definitely did not just get stuck in an Double Rainbow meme spiral on Google Images). Yet a colour scheme can make things feel a little bit more sophisticated.

As predicted, I couldn't resist one colour and instead went for five (I did later skip the blue however). If you don't have coloured pens to go with all of your chosen colours, using a black, silver or gold marker is always a good shout.
4. THROW SOME SHAAAPES.
And what I mean by that is cut out the shapes your heart most desires from the super interesting bits of magazine you've found.
I chose triangles because I'm Illuminati confirmed, now you know. I also just like geometric designs.

To get the perfect shapely shapes, grab your pencil and draw them on the BACK (the side you don't want facing up on your notebook) so you don't have any pesky pencil lines showing when you glue everything down. Then, grab your scissors and cut out your shapes. As you might have a lot to do depending on the size of your notebook, I recommend listening to a banging playlist such as this one.
 |
YAY
|
5. Get gluing.

The good thing about triangles is that they tessellate - if you're using shapes that don't (e.g. cute lil' circles) then I'm sorry you are the weakest link goodbye you might want to overlap them, in which case you'll get a cool textured effect. I tried my best to leave an equal gap between the triangles so I wouldn't have to fit them next to each other perfectly. It also looks groovy, which is a bonus.
 |
| Janelle Monae taking pride of place |
Of course there's no law of notebook design which says that the same pattern has to cover the entire thing (there's none full stop, just to clarify). If you do want to sneak in some bigger versions of your shapes or indeed a picture of one of your musical/life heroes then go ahead and do iiiiiiiiit. After all, you're going to be the one using this notebook and if it's for studying, you'll need it to look inviting so you want to stop procrastinating that little bit more.
6. Add more detail with coloured pens.
And ta-da!

To finish off my notebook cover, I did two things. Firstly, I used my beloved Sharpies to add details to the left and right edges of my design in colours that matched each shape I was doodling next to. Secondly and finally, the apt heading of 'Research Journal' was bubble-written into the remaining space by yours truly. For a study notebook, it's always a good idea to have some reminder of what you're meant to be using it for on the front for that extra, motivational boost.
~~~~~~~~~~~~~~~~~~~~~~~~~~~~~~~~~~~~~~~~~~~~~~~~~~~~~~~~~~~~~~~~~~~
And there ya have it! If you have a couple of hours to spare, it's definitely worth saving some dosh and enjoying spending some time on creating something you're sure to use and be proud of.
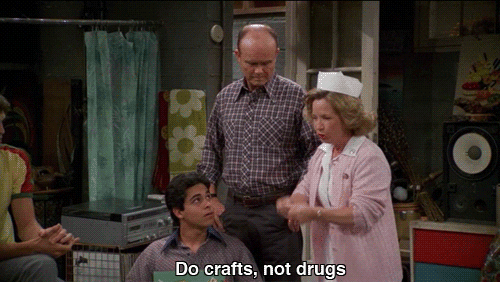 |
| what Eric's mom said |
Comments
Post a Comment